I may receive a commission if you purchase something mentioned in this post. See more details here.
I live in Minnesota, and Winter. Is. Here.
Bring on the chapped skin!
In the next week or two, I’ll be posting about my homemade lube recipe. Well, I’ve been using that on my hands. Seriously. It’s the only thing in the house strong enough.
So then I got to thinking. Why not make the base, a DIY healing ointment if you will, and add different essential oils to it so that it works even better on my hands? Like lavender for soothing, or myrrh, which is the only thing that allowed my chapped hands to survive last winter?
I thought I was pretty brilliant, because I’m modest like that.
This base is so simple and versatile, you can really make it into anything! From a healing salve to a vapor rub to a homemade Soothing Rub to much more. This is why I love DIY – you can take something simple and good for your body, and customize it to make it exponentially more healing based on what YOUR body needs. It is completely non-toxic and free of harmful chemicals. And it saves you a ton of money over buying all the ointments you need. Yes.
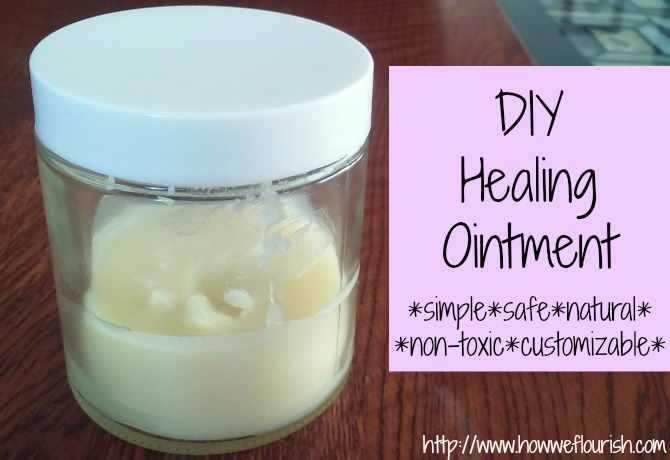
This DIY healing ointment has just two incredibly natural ingredients: coconut oil, which is moisturizing, great for the skin, and anti-microbial in natural; and beeswax, which firms up the product and gives a smoother consistency.
Ready to get started? Be warned: You’ll want to make as many jars of this as you can!
All-Purpose DIY Healing Ointment
Ingredients:
- 1/3 cup coconut oil
- 1-2 Tbsp beeswax pellets*
- Essential oils (see below)
Instructions:
- Melt coconut oil and beeswax* over low to medium-low heat in a small saucepan.
- Remove from heat and add essential oils (see below).
- Pour into a glass container and allow to harden.
- Store away from direct heat or sunlight.
- To use: scoop a small amount out, soften between fingers, and apply to desired area.
*Note: The amount of beeswax you will need will depend on the temperature of your house. In the summer, I used 2 tablespoons of beeswax pellets and it gave a really nice consistency. It firmed up the liquid coconut oil enough to make an easy-to-use ointment. However in the winter, this much beeswax made it rock solid. Reducing to 1 tbsp beeswax gave a much better consistency.
Customize with Essential Oils
This healing ointment can be used plain as a moisturizer, or essential oils may be added to offer any range of functions. I only recommend using the highest quality of pure, therapeutic grade oils to ensure you are getting the maximum benefit without any adverse reactions. On that note, for small or sensitive children, you will want to reduce the oil added to provide even more dilution than the ointment already offers.
Here are some ideas for what you can add to each batch of healing balm:
Soothing ointment (for irritated skin): add 8 drops lavender
Healing ointment (for cuts, scraps, etc.): 7 drops each melaleuca and lavender OR 5 drops melaleuca and lavender, and 3 drops each frankincense and helichysum
Intensive cream (for extremely dry or irritated skin): 4 drops each of geranium, myrrh, and/or cedarwood
Vapor rub (for respiratory complaints, apply to the chest or a small amount under the nose): add 8 drops Respiratory Blend
Homemade Soothing Rub (for sore muscles, achy joints, etc.): add 8 drops Soothing Blend
Chapped skin balm: add 4 drops each lavender and myrrh
Scented hand cream: add 5 drops of your favorite essential oils (suggestions: wild orange, Invigorating Blend, bergamot, Grounding Blend, Calming Blend, Women’s Blend)
Homemade personal lubricant (read more here): add 5 drops ylang ylang
What are you going to add to your DIY healing ointment?
Pin it:
 Shared on Wildcrafting Wednesdays
Like what you see? Please support this blog and help me keep it running by signing up for my newsletter, purchasing products, or donating through the links below:


DISCLOSURE: In order for me to support my blogging activities, I may receive monetary compensation or other types of remuneration for my endorsement, recommendation, testimonial and/or link to any products or services from this blog. The information contained in this post is not intended nor implied to be a substitute for professional medical advice, it is provided for educational purposes only. You assume full responsibility for how you choose to use this information. For more information, click here.
I love it! I have itchy skin on my legs and all the creams I buy only make it worse. I am definitely going to try your healing ointment with lavender.
I had the same problem with eczema. Lavender is a lifesaver for irritated skin.
This is so perfectly simple – I really need this here in MI too! And safe for the girls too.
Yeah, I’m sure you do! And that’s what I love about it – it’s so safe for whomever you use it on.
I use a similar recipe to make some tooshie salve for my little man’s diaper rash. It’s a lot cheaper to make your own stuff too!
I know! I should add this in somewhere – the base costs like $2 to make and lasts a long time.
I think I might have to try this. I have the worst dry skin and chemicals irritate it.
Do it! I have the same problem with chemicals and this works wonders.
I love this. It always feels great to make your own too.
Yes it does!
I love how easy this is and how you can customize whatever oils you want. Thank you!
Love simple and effective DIY medicines!
It’s definitely the season for dry, itchy skin. It always happens to me on my knuckles. :/
I need to try this! I hate winter hands and lips! Thanks for sharing! I do think your brilliant!
Thank you so much! I hope you enjoy it.
This would make a lovely gift to a new mom! Love it!!!
Great idea!
Can’t wait to try this! Last winter was brutal in Pennsylvania and this year they are predicting another harsh one. Thanks!
Let me know how you like it!
Love this idea, Chloe! I’ve pinned it and plan to make it over Christmas break! 🙂 Thank you!
That’s great to hear! I hope you love it!
We make something similar, it’s amazing how good a few simple ingredients can feel. Thanks so much for sharing at Simple Lives Thursday; hope to see you again this week.
Love this idea! Made it today! What is the trick to keeping this soft sonit doesn’t harden? Coconut oil is solid at room temp. The beeswax doesn’t seem to help…..
The beeswax will make it harder – it keeps it a good consistency in the summer (instead of being liquid). I have never tried to make it softer in the winter, but I would imagine adding a liquid oil, like grapeseed, would help.